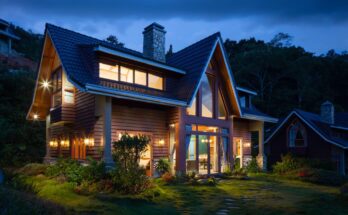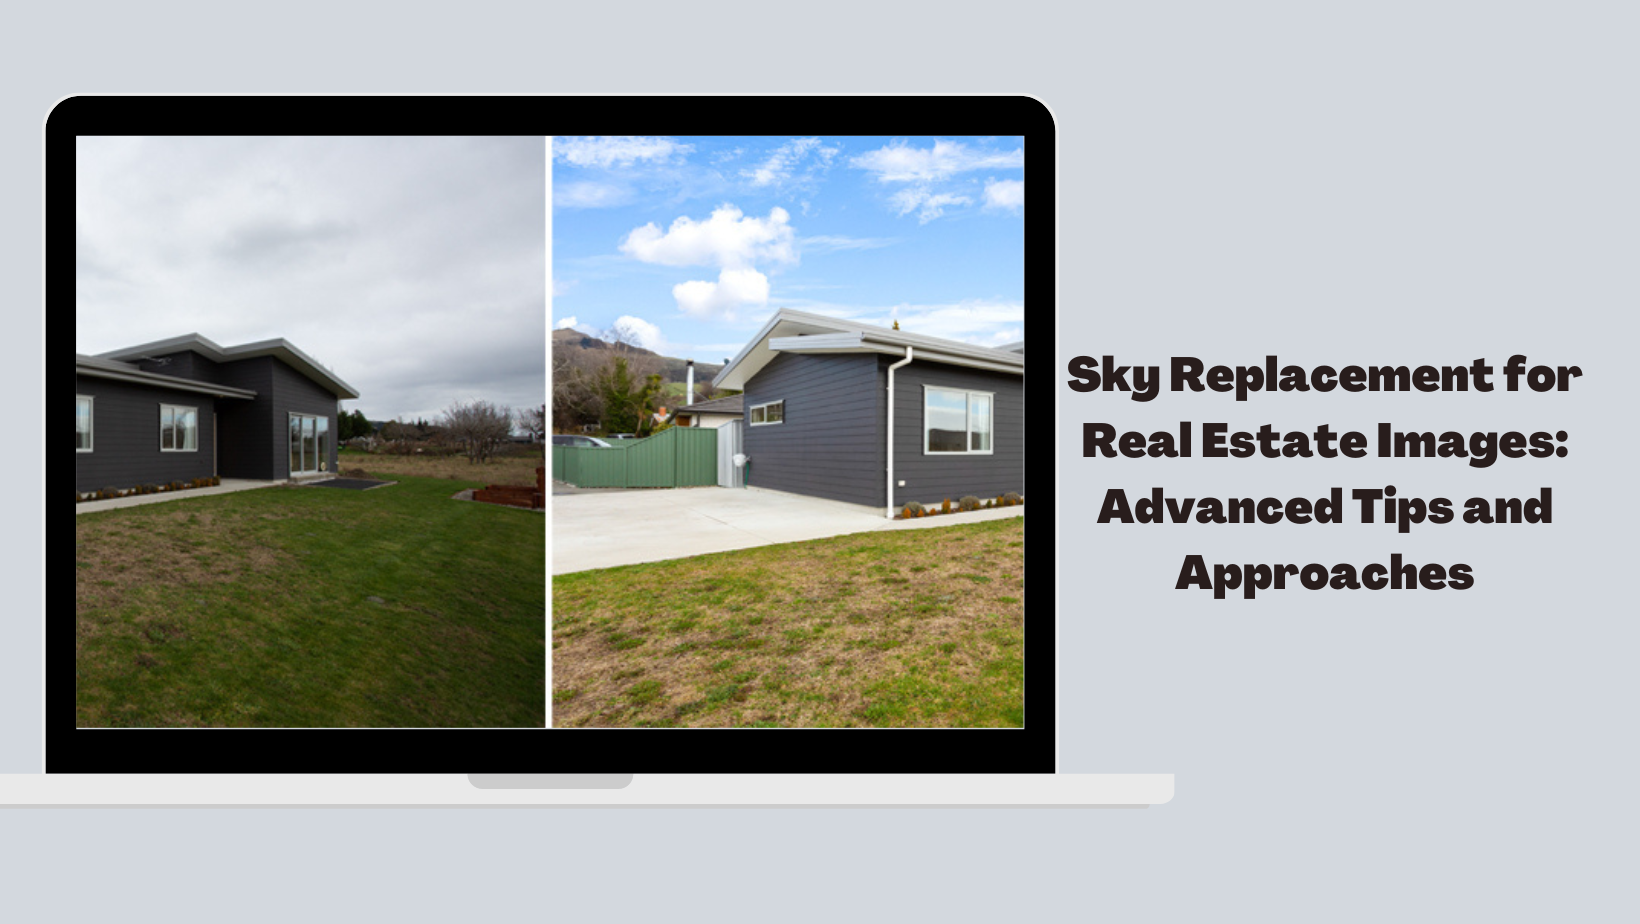
Real estate photography is all about presenting a property in the best possible light to attract potential buyers. And often, that means making some adjustments to the images captured during the shoot. One of the most impactful ways to enhance real estate photos is by replacing the sky.
The sky is an essential element of any real estate photo. It sets the tone, mood, and overall ambiance of the image. A dull or overcast sky can make an otherwise beautiful property look uninviting, while a bright and colorful sky can make it look more attractive and welcoming. Real estate photo editing techniques, such as sky replacement, can be used to fix issues that arise during a shoot, including an unappealing sky or glare from the sun.
In this blog, we will cover advanced sky replacement tips and techniques that can take your real estate photos to the next level. Whether you are a real estate photographer or a property owner looking to enhance your listings, mastering sky change replacement can significantly elevate the visual appeal and impact of your images.
Advanced Tips and Techniques for Sky Replacement
Achieving a natural look when replacing the sky in real estate photographs requires skill and expertise. In this section, we will provide advanced tips and techniques for achieving professional-grade results.
Tip 1: Use Luminosity Masks for Precise Sky Replacement
Luminosity masks are a powerful tool for sky replacement in digital image editing. The technique of using luminosity masks involves creating a mask based on the brightness values (or luminosity) of the image, which can be used to selectively adjust or replace the sky while maintaining the detail and tonality of the original image.
To use luminosity masks, follow these steps:
- Open the image you want to edit in your preferred photo editing software.
- Duplicate the background layer so that you have a copy to work with.
- Use the levels of curves adjustment tool to increase the contrast of the image. This will help to create more defined luminosity masks.
- Create a luminosity mask using the levels adjustment tool. This is used to adjust the tonal range of an image creating a high-contrast mask that can be used to selectively target specific areas of an image.
- Use the luminosity mask to adjust the sky in the image. Duplicate the layer with the sky you want to replace and add the new sky layer above the original. Then, use a layer mask to hide the areas of the new sky layer that you don’t want to show. Finally, use a soft brush to paint on the layer mask and reveal the new sky.
- Add the new sky image to the layer below the original sky layer and align it properly. Use a layer mask to reveal the new sky where desired.
- Use adjustment layers to fine-tune the color and tone of the new sky. You can use tools like Curves, Levels, or Hue/Saturation to match the color and tone of the new sky to the original image.
- Finally, merge the layers and save the edited image.
Tip 2: Create Realistic Reflections for Sky Replacement
When replacing the sky in a real estate photo, it’s essential to create realistic reflections of the new sky in the water and other reflective surfaces in the original image. This will help to blend the new sky seamlessly into the image and avoid any distractions. The result is an image that looks natural and visually appealing.
To create realistic reflections, follow these key steps:
- Identify the areas of the image where you want to add reflections. Look for bodies of water or other reflective surfaces that would realistically reflect the sky.
- Select the area where you want to add reflections using a selection tool such as the lasso or magic wand. Be sure to include the reflection and any surrounding areas that might affect the reflection.
- Duplicate the selected area onto a new layer and flip it vertically.
- Move the flipped layer to the appropriate location below the original layer, and use the Transform tool to adjust the size and perspective of the reflection.
- Apply a layer mask to the reflection layer and use a soft brush to blend the reflection into the surrounding area. You may need to adjust the opacity of the reflection layer to achieve a realistic effect.
- Finally, use adjustment layers such as Curves or Levels to fine-tune the color and tone of the reflection so that it matches the rest of the image.
Tip 3: Blend Different Sky Images for a Seamless Result
The technique of blending sky images involves selecting multiple sky images that have similar lighting, color tones, and perspective to the original photo and blending them to create a natural-looking picture. By using this technique, you can create a more inviting and pleasant atmosphere for the property. When blending sky images, it’s essential to ensure that the new sky integrates well with the foreground elements of the image.
To blend different sky images, follow these steps:
- Choose multiple sky images that have similar exposure, color, and perspective to the original photo. You can use stock photos, your photos, or even images captured on the same day as the original photo.
- Select the part of the sky you want to use. You can use a selection tool like the lasso tool or the magic wand tool for your selection.
- Copy the selected sky image and paste it into a new layer on top of the original photo.
- Use the transform tool to adjust the size, perspective, and position of the sky image to match the original photo. You may also need to adjust the opacity or blending mode of the sky layer to achieve a proper blend.
- Repeat steps 4 and 5 for each additional sky image, making sure to blend the different sky layers, to make the image as seamless as possible.
- Finally, use layer masks and/or adjust the opacity to fine-tune the result and make it look natural and cohesive.
Tip 4: Use Gradient Maps for a Consistent Color Palette
Using gradient maps for replacing the sky in real estate photos can be a helpful technique to ensure that the colors of the new sky blend with the rest of the image. It involves mapping the colors of the new sky to a gradient spectrum that matches the existing colors in the photo to ensure a consistent and natural-looking final result.
To use gradient maps for a consistent color palette, follow these steps:
- Using the appropriate selection tool, select the sky area in the duplicate layer. You can refine the selection using tools like the refine edge tool or the mask tool.
- Invert the selection to choose the foreground area, and then remove the sky using a suitable method such as the eraser tool or a layer mask. This step separates the sky from the foreground.
- Create a new adjustment layer, and select Gradient Map from the list of options.
- Choose a gradient that has the colors you want to use for the sky replacement. You can create your gradient or use one of the presets provided by the editing software.
- Adjust the opacity of the Gradient Map layer as needed to achieve the desired effect.
- Merge the gradient map layer with the image layers below it, and save the edited image.
Tip 5: Add Cloud Shadows for Depth and Realism
By simulating the way clouds cast shadows on a landscape or building, you can make the sky replacement look more natural and convincing.
To add cloud shadows to your real estate photo, follow these steps:
- Select the layer that contains the new sky image you want to add cloud shadows to.
- Create a new layer above the existing layer.
- Select a soft brush tool and choose a dark gray or black color.
- Use the brush tool to paint shadows on the landscape where the clouds would realistically cast shadows.
- Adjust the opacity of the shadow layer until the shadows look natural and blend well with the photo.
- Use a layer mask to refine the edges of the shadow layer and make it look more realistic.
Tip 6: Remove Noise and Artifacts for a Polished Result
This is an important step in achieving a polished and professional-looking result when performing sky replacement during real estate image enhancement. When you replace the sky in a photo, it’s common to see noise or artifacts in the image, which can detract from its overall quality. Here are the general steps involved in removing noise and artifacts:
- Select the layer that contains the new sky image and duplicate it.
- Apply a noise reduction filter to the duplicated layer. Different software may have different filters, but common ones include “Reduce Noise,” “Noise Reduction,” or “Denoise.” Adjust the settings until the noise and artifacts are reduced to an acceptable level.
- Use a layer mask to reveal the parts of the new sky image that are not affected by the noise reduction filter. This will ensure that the sky looks sharp and detailed.
- Use a healing brush or clone stamp tool to remove any remaining artifacts or imperfections in the image. Be careful not to overdo it, as this can make the photo look unnatural.
- Apply any final adjustments, such as color correction or brightness/contrast adjustments, to ensure a consistent and polished look.
By utilizing these advanced tips and tricks for sky replacement, you can obtain a more realistic and natural-looking outcome. With a variety of editing software options available, you can choose the one that best suits your needs and implement these techniques to achieve stunning results.
In Conclusion
Sky replacement can be a powerful technique in transforming your real estate photos and giving them a polished and professional touch. If you’re short on time or lack the necessary skills, outsourcing real estate sky change services can be a great option. A professional photo editing company can provide you with the expertise and tools to deliver high-quality results quickly and efficiently. By outsourcing advanced sky replacement services, you can focus on other aspects of your business while still benefiting from the improved appearance of your property images.